This is the multi-page printable view of this section. Click here to print.
Integrations
Horreum Integrations
- 1: Collector API
- 2: Slack
- 3: ElasticSearch
- 4: Jenkins
- 5: Postgres
- 6: Grafana
1 - Collector API
Use Collector API to query JSON for analysis
If you have a lot of data already stored in a Collector instance, you can query it and analyze the data for regressions in Horreum.
Configuration
To configure a test to use the Collector API backend, you need to be a team administrator. With the correct permissions, you can:
- Generate a new API key for the
Collector APIbackend: Please see the collector docs on how to Create a new API token - Navigate to
Administration->Datastoresconfiguration page, e.g.http://localhost:8080/admin#datastores - Select the
Teamfrom theTeamdropdown that you wish to configure - Click
New Datastore
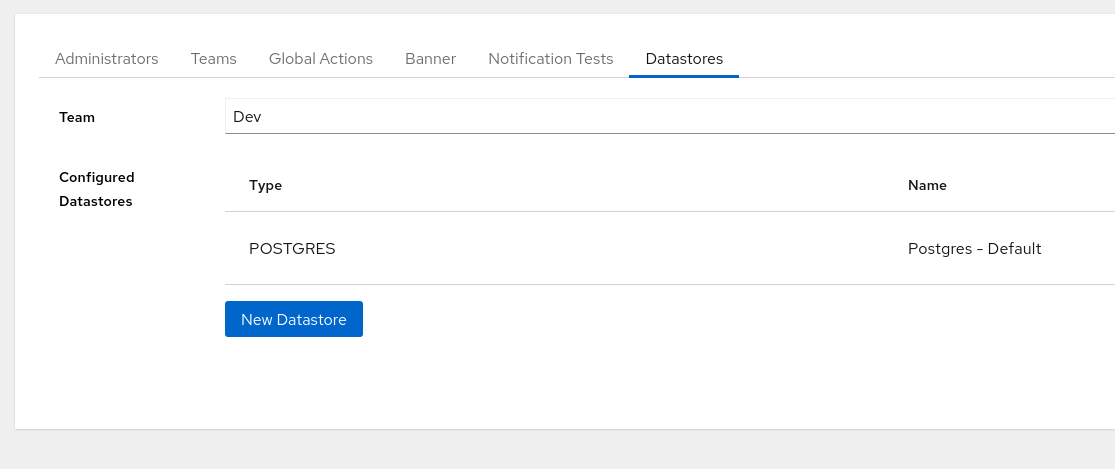
New Datastore
- Configure the
Collector APIDatastore:
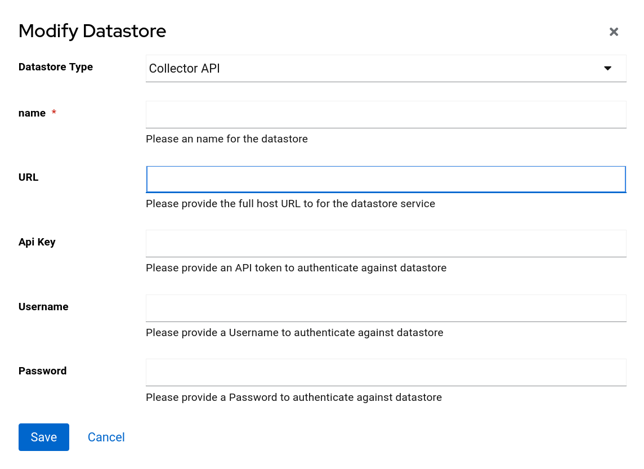
New Collector API Datastore
1. Select `Collector API` from the `Datastore Type` dropdown
2. Provide a `Name` for the Datastore
3. Enter the `URL` for the Collector instance
4. Enter the `API Key` for the Collector instance, generated in step 1
5. Click `Save`
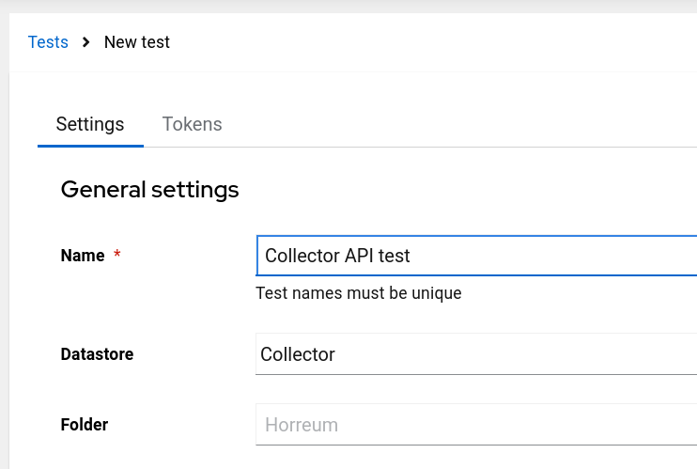
Test Configuration
To configure a test to use the Collector API backend, you can:
- Navigate to a test configuration page, e.g.
http://localhost:8080/test/10 - Select the
Collector APIbackend defined in theDatastoresconfiguration from theDatastoredropdown
Configure Test
- Click
Save
2 - Slack
Using Actions to post updates to Slack
Horreum can be configured to post messages to a Slack channel through the
slack-channel-message action. Actions can be triggered on various Horreum
lifecycle events: see Configure Actions
for details.
Configuration
Before you can configure a Slack action, either globally or for a specific test, you’ll need to create and install a “Slack application” as a bot allowed to post messages to a specific Slack channel.
- Create a Slack App. You can do this through the Slack development CLI, or by clicking “Create New App” on the web interface at Slack Apps:

- Open the “OAuth & Permissions” tab and scroll down to the “Scopes” header.
Add your scopes by clicking on the “Add an OAuth Scope” button. The Horreum
Slack Action requires the
channels:joinandchat:writescopes:

- Once you’ve created the app, you’ll need to install it in your Slack workspace. Depending on the workspace, you may need to request approval from a workspace administrator:

- Once installation is complete, Slack will give you a “BotUser OAuth Token”; a
long string that should start with “xoxb-”. This token identifies and authenticates
your app (in this case, the Horreum server) to Slack, and you’ll need to provide
this value to Horreum as the
tokensecret when configuring an Action.

- Now you need to give your app permission to post to your chosen Slack channel by using your token to “join” the channel. In the Slack UI (either the web UI or in the Slack app), you can right-click on the channel and choose “View channel details”. At the bottom of the sheet that opens you should see an alphanumeric string labeled “Channel ID”, with a “copy to clipboard” icon following the value.

Navigate to the online conversations.join Test API and enter the OAuth bot token and the Channel ID in the input boxes, and click “Test method”. You should get a success API response, and you (and Horreum) can now use your OAuth token to post bot messages to the designated Slack channel ID.

Configuring a Horreum Slack Action
Using either the API or the UI, you can create a Slack Action globally or for a specific Test. You will supply both the Slack channel ID and the Slack App bot token you created earlier, along with specifying the particular event and formatted template you want to post.
TBD
3 - ElasticSearch
Use ElasticSearch to query JSON for analysis
If you have a lot of data already stored in an Elasticsearch instance, you can query it and analyze the data for regressions in Horreum.
Configuration
To configure a test to use the elasticsearch backend, you need to be a team administrator. With the correct permissions, you can:
- Generate a new API key for the
elasticsearchbackend: Please see the elasticsearch docs on how to generate an API key on the Management page - Navigate to
Administration->Datastoresconfiguration page, e.g.http://localhost:8080/admin#datastores - Select the
Teamfrom theTeamdropdown that you wish to configure - Click
New Datastore

New Datastore
- Configure the
ElasticsearchDatastore:
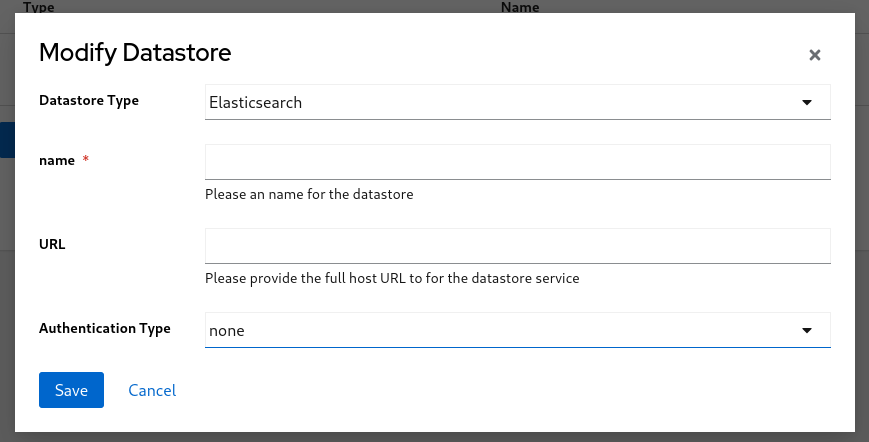
New Datastore
- Select
Elasticsearchfrom theDatastore Typedropdown - Provide a
Namefor the Datastore - Enter the
URLfor the Elasticsearch instance - Select
api-keyfromAuthentication Typefrom dropdown - Enter the
API Keyfor the Elasticsearch instance, generated in step 1 - Click
Save
Test Configuration
To configure a test to use the elasticsearch backend, you can:
- Navigate to a test configuration page, e.g.
http://localhost:8080/test/10 - Select the
Elasticsearchbackend defined in theDatastoresconfiguration from theDatastoredropdown

Configure Test
- Click
Save
4 - Jenkins
Use the Jenkins Plugin to upload data directly to Horreum from a Jenkins pipeline
Details of the Jenkins Plugin can be found on the Horreum Plugin Github Repository
5 - Postgres
Postgres as the datasource to store JSON documents
By default, the datasource is configured to use the postgres database backend.
Data submitted to the Horreum API will be stored in a Postgres database, alongside all the metadata required to query and retrieve the data.
Query results from other datasources will be cached in the same postgres database.
Configuration
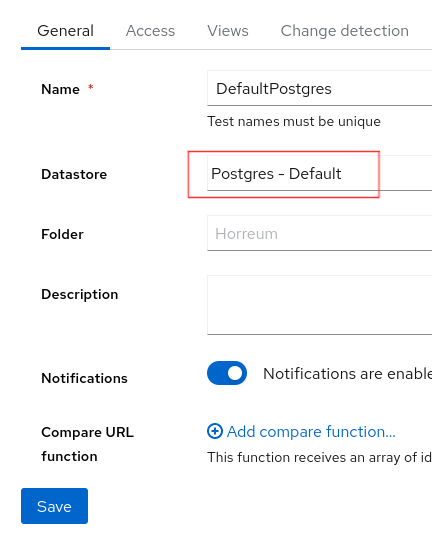
To configure a test to use the postgres backend, you can:
- Navigate to a test configuration page, e.g.
http://localhost:8080/test/10 - Select the
Postgres - Defaultbackend from theDatastoredropdown
Postgres Datastore
- Click
Save
Migrating Data from Other Backends
If you wish to migrate data from one backend store to the postgres backend, you can configure a Test to retrieve the data from the old backend and submit it to the Horreum API.
Once the data has been cached, you can then use the postgres backend as the Test backend and any new data pushed to Horreum will be analyzed alongside the migrated data.
6 - Grafana
Configure Horreum as a datasource in Grafana
Grafana is a popular tool for visualizing time series data. Horreum can be configured as a datasource in Grafana to allow you to view the data processed by Horreum.
Prerequisites:
- Horreum is running, and you are logged in
- You have access to a running Grafana instance. If you do not have an environment available, please follow the official documentation for your platform.
Configure Horruem as a Datasource
1. Install the JSON Datasource plugin for Grafana
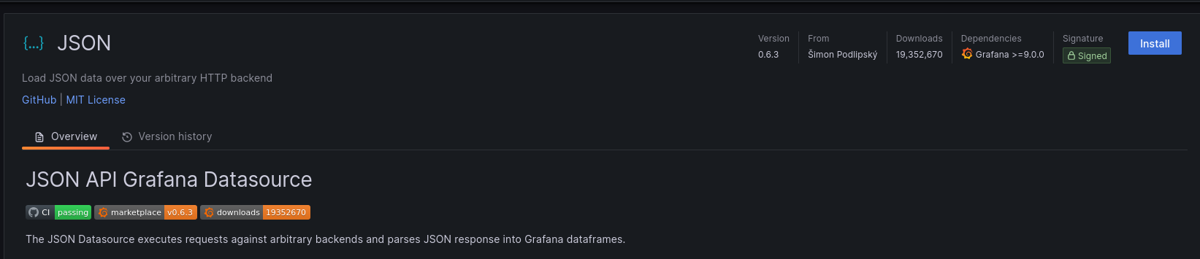
Install JSON Grafana Plugin
2. Add new Datasource
2.1 Click “Add new data source” button

Click “Add new data source”
2.2 Configure Horreum as a Datasource
Configure the datasource as follows:
- Name: Horreum
- URL: https://<horreum_host>/api/changes
- Access: Server (Default)
- Forward OAuth Identity: checked
Click “Save & Test” button
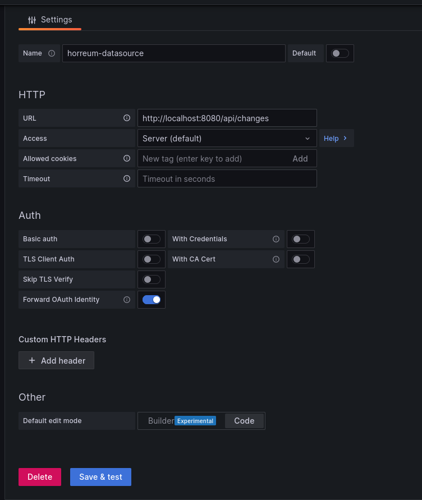
Configure Horreum JSON Datasource
If successful, you should see the following message:

Datasource Successful
Querying Horreum data
Now that you have Horreum configured as a datasource, you can query the data in Horreum from Grafana.
1.1 Create a new Dashboard
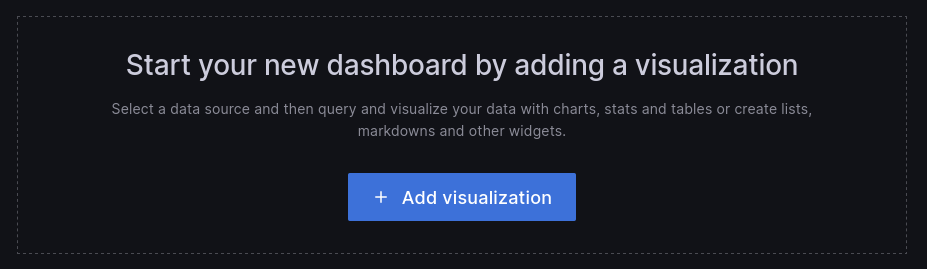
Create new Dashboard
2.2 Add Horreum as Datasource
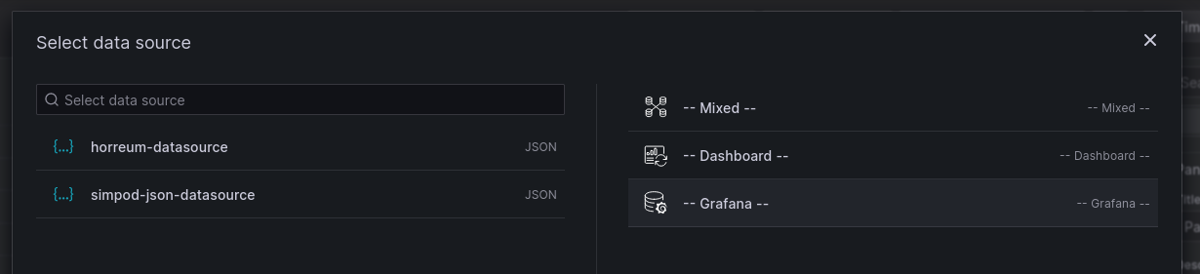
Select Horreum Datasource created in previous step
2.3 Provide a name for the new Panel
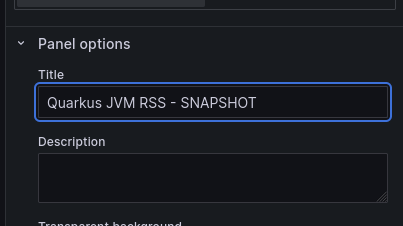
Set panel name
2.4 Define query
Horreum provides an API that Grafana can natively query.
In order for Grafana to query Horreum, you must provide a Metric payload that defines the query.
The Metric is a String that consists of the Variable ID and Fingerprint seperated by a semi-colon ;.
e.g. Metric : 23219;{"buildType":"SNAPSHOT"}
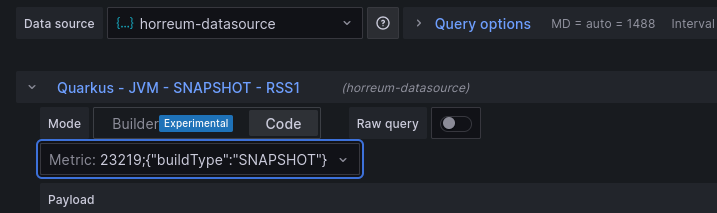
Define query metric
2.5 Save panel

Save panel
2.5 View Dashboard
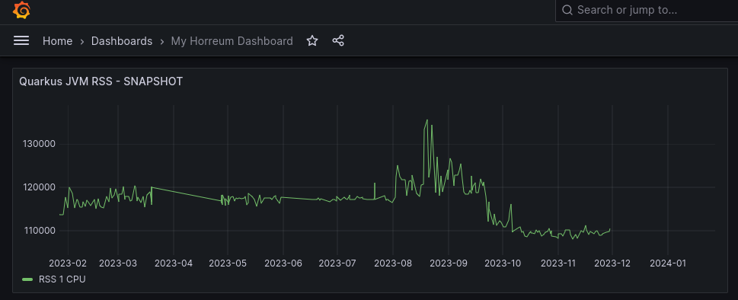
View Dashboard