Upload Run

Horreum accepts any valid JSON as the input. To get maximum out of Horreum, though, it is recommended to categorize the input using JSON schema.

There are two principal ways to authorize operations:

  • Authentication against OIDC provider (Keycloak): This is the standard way that you use when accessing Horreum UI - you use your credentials to get a JSON Web Token (JWT) and this is stored in the browser session. When accessing Horreum over the REST API you need to use this for Bearer Authentication. The authorization is based on the teams and roles within those teams that you have.
  • Horreum Tokens: In order to provide access to non-authenticated users via link, or let automated scripts perform tasks Horreum can generate a random token consisting of 80 hexadecimal digits. This token cannot be used in the Authorization header; operations that support tokens usually accept token parameter.

If you’re running your tests in Jenkins you can skip a lot of the complexity below using Horreum Plugin. This plugin supports both Jenkins Pipeline and Freeform jobs.

Getting JWT token

New data can be uploaded into Horreum only by authorized users. We recommend setting up a separate user account for the load-driver (e.g. Hyperfoil) or CI toolchain that will upload the data as part of your benchmark pipeline. This user must have the permission to upload for given team, e.g. if you’ll use dev-team as the owner this role is called dev-uploader and it is a composition of the team role (dev-team) and uploader role. You can read more about user management here.

TOKEN=$(curl -s http://localhost:8180/realms/horreum/protocol/openid-connect/token \
    -d 'username=user' -d 'password=secret' \
    -d 'grant_type=password' -d 'client_id=horreum-ui' \
    | jq -r .access_token)

A note on JWT token issuer: OIDC-enabled applications usually validate the URL that issued the request vs. URL of the authentication server the application is configured to use - if those don’t match you receive 403 Forbidden response without further information. Had you used http://localhost:8180 as KEYCLOAK_URL in the example above you would get rejected in developer mode with the default infrastructure, even though localhost resolves to 127.0.0.1 - the URL has to match to what you have in horreum-backend/.env as QUARKUS_OIDC_AUTH_SERVER_URL. You can disable this check with -Dquarkus.oidc.token.issuer=any but that is definitely not recommended in production.

Using offline JWT token

Access token has very limited lifespan; when you want to perform the upload from CI script and don’t want to store the password inside you can keep an offline token. This token cannot be used directly as an access token; instead you can store it and use it to obtain a regular short-lived access token:

OFFLINE_TOKEN=$(curl -s http://localhost:8180/realms/horreum/protocol/openid-connect/token \
    -d 'username=user' -d 'password=secret' \
    -d 'grant_type=password' -d 'client_id=horreum-ui' -d 'scope=offline_access' \
    | jq -r .refresh_token)
TOKEN=$(curl -s http://localhost:8180/realms/horreum/protocol/openid-connect/token \
    -d 'refresh_token='$OFFLINE_TOKEN \
    -d 'grant_type=refresh_token' -d 'client_id=horreum-ui' \
    |  jq -r .access_token)

Note that the offline token also expires eventually, by default after 30 days.

Getting Horreum token

In order to retrieve an upload token you need to navigate to particular Test configuration page, switch to tab ‘Access’ and push the ‘Add new token’ button, checking permissions for ‘Read’ and ‘Upload’. The token string will be displayed only once; if you lose it please revoke the token and create a new one.

This token should not be used for Bearer Authentication (do not use it in the Authorization HTTP header) as in the examples below; instead you need to append &token=<horreum-token> to the query.

Uploading the data

There are several mandatory parameters for the upload:

  • JSON data itself
  • test: Name or numeric ID of an existing test in Horreum. You can also use JSON Path to fetch the test name from the data, e.g. $.info.benchmark.
  • start, stop: Timestamps when the run commenced and terminated. This should be epoch time in milliseconds, ISO-8601-formatted string in UTC (e.g. 2020-05-01T10:15:30.00Z) or a JSON Path to any of above.
  • owner: Name of the owning role with -team suffix, e.g. engineers-team.
  • access: one of PUBLIC, PROTECTED or PRIVATE. See more in data access.

Optionally you can also set schema with URI of the JSON schema, overriding (or providing) the $schema key in the data. You don’t need to define the schema in Horreum ahead, though, the validation is triggered automatically whenever you add a Run or update the schema, and you’ll see the result icon in Runs/Datasets listing for given test.

The upload itself can look like:

TEST='$.info.benchmark'
START='2021-08-01T10:35:22.00Z'
STOP='2021-08-01T10:40:28.00Z'
OWNER='dev-team'
ACCESS='PUBLIC'
curl 'http://localhost:8080/api/run/data?test='$TEST'&start='$START'&stop='$STOP'&owner='$OWNER'&access='$ACCESS \
    -s -X POST -H 'content-type: application/json' \
    -H 'Authorization: Bearer '$TOKEN \
    -d @/path/to/data.json

Assuming that you’ve created the test let’s try to upload this JSON document:

{
  "$schema": "urn:my-schema:1.0",
  "info": {
    "benchmark": "FooBarTest",
    "ci-url": "https://example.com/build/123"
  },
  "results": {
    "requests": 12345678,
    "duration": 300 // the test took 300 seconds
  }
}

When you open Horreum you will see that your tests contains single run in the ‘Run Count’ column.
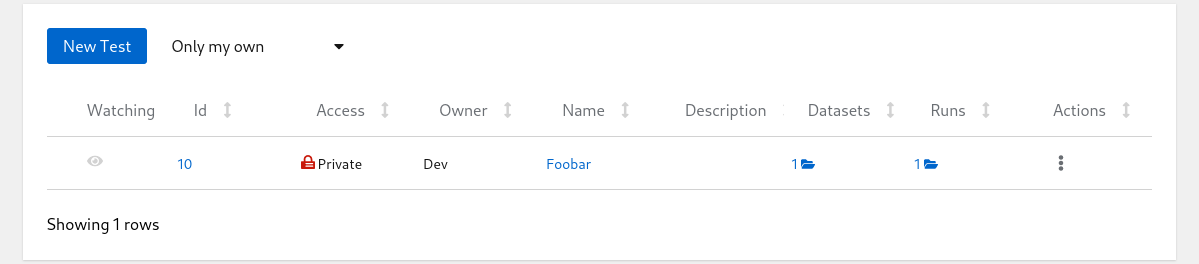
Tests List

Click on the run count number with open-folder icon to see the listing of all runs for given test:
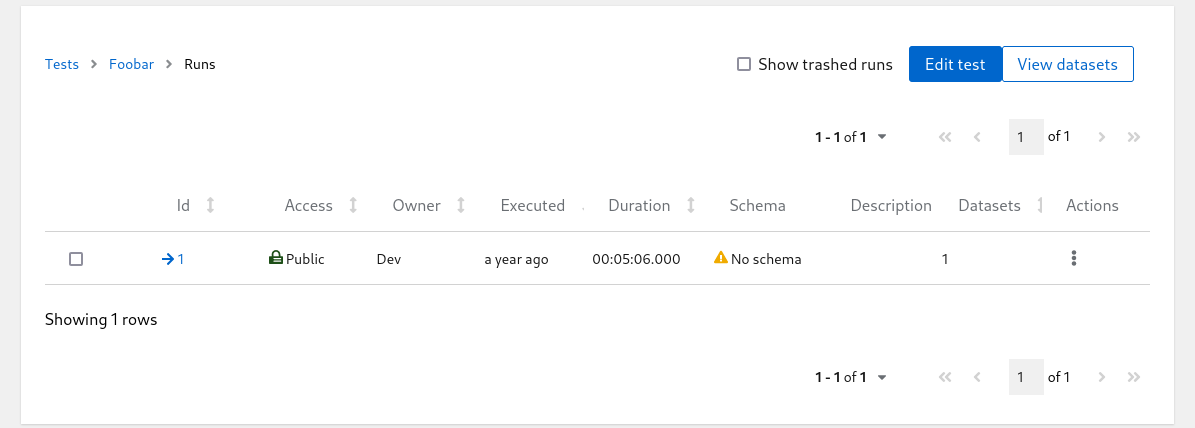
Runs List

Even though the uploaded JSON has $schema key the Schema column in the table above is empty; Horreum does not know that URI yet and can’t do anything with that. You can hit the run ID with arrow icon in one of the first columns and see the contents of the run you just created:
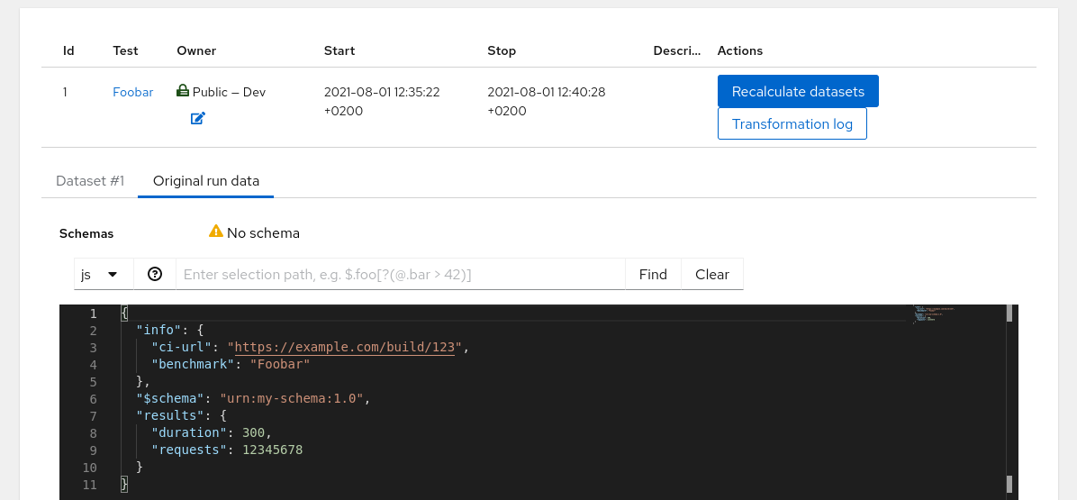
Run Details

This page shows the Original Run and an empty Dataset #1. The Dataset content is empty because without the Schema it cannot be used in any meaningful way - let’s create the schema and add some labels.